User Guide
Installation
VESC setup
In the VESC Tool set:
- App Settings > General > App to Use: PPM and UART
- App Settings > UART > Baudrate: 115200 bps
Assembly and mounting to a deck
DAVEGA kit assembly instructions are available on a separate page.
Installing assembled DAVEGA is straightforward. On boards with a bottom mounted VESC, you will typically want to make a small hole in the deck to route the cable. You may want to unpin the crimps from the cable connector to be able to route through a smaller hole. The cable setup video explains how to unpin the crimps.
On boards with a top mounted VESC, consider getting the rubber gasket or printing the following spacer so that you can easily route the cable out of the housing.
See the installation section in the gallery for examples of how people installed DAVEGA on their boards.
Note that the DAVEGA baseplate is made of aluminum and thus is fairly soft. When attaching the housing to the baseplate, be sure not to overtighten the bolts, otherwise you'll strip the threads.
Connecting to VESC
Each DAVEGA pin connects to the equally labeled VESC pin. For example, GND connects to GND, RX connects to RX, 3.3V connects to 3.3V or VCC, etc.
If you have DAVEGA X v1.1, it’s critical that you don’t accidentally connect it to the 5V input. This would destroy it instantly.
Note that with DAVEGA FW v4.04 or later, it's OK to swap the RX/TX wires.

Basic setup
Drive settings and battery settings need to be configured for the DAVEGA to work correctly. Most of the settings are straightforward. However, some users struggle with the battery capacity and battery usable capacity so we'll explain how to set up these two.
Battery capacity
Often, people know their battery capacity in Wh but not in mAh. The value can be converted as follows. Divide the total capacity by the number of series (the S value) to get the Wh capacity per parallel group. Divide by 3.6 (nominal cell voltage) to get the capacity in Ah. Multiply by 1000 in order to convert to mAh.
For example, your battery is 12S6P with the total capacity of 1036.8 Wh. The capacity per parallel group is 1036.8 / 12 = 86.4 Wh. This is 86.4 / 3.6 = 24 Ah or 24000 mAh.
Battery usable capacity
For new batteries, the usable capacity is typically around 80% (this is the default value in the DAVEGA settings).
As your battery deteriorates, you may want to lower the usable capacity in order to keep the projected range calculations accurate. As a rule of thumb, if your projected range is unexpectedly high, set the usable capacity lower and vice versa. First, check that all your battery settings are correct though.
WiFi setup
Open the menu (press the middle button) and select WiFi.
Select your WiFi network under SSID.
Enter your WiFi password. Use the up/down buttons to navigate through the characters and the middle button to confirm a character. When finished, scroll all the way down for the "enter". If you need to make a correction, scroll all the way down and one up for the "backspace".
Use test connection to check that the WiFi is setup correctly.
If you're unable to connect, you may try increasing the connect timeout. If that doesn't help, double check your WiFi password is correct or move closer to your WiFi access point.
Firmware updates
Make sure you have the WiFi set up correctly and you are within the reach of your WiFi network.
Select Update & Backup from the menu. DAVEGA will reboot. Open the Firmware sub-menu. Select the desired firmware version and choose download and use.
Device ID
You will need to know your device ID for downloading your data backups, for using the analytics functions, or when contacting the technical support.
Select About in the menu and note the device ID on the first line.
Your device ID is a confidential information. Do not share it with anyone.
Data backup
Starting from v1.2.0, data can be backed up to cloud over WiFi. Enter the Backup submenu and select backup config & data. With v3.x.x or later, go to Update & Backup first.
Alternatively you can make an offline backup over USB using the DAVEGA X Tool.
The offline backup can be restored using the Import files action in the DAVEGA X Tool.
Online backup can be downloaded from the backups page and restored the same way as the offline backup.
Other settings
Most of the settings are explained in the DAVEGA X demo:
Restore factory settings
To restore the factory settings, hold all three buttons while booting up. A ten to zero countdown will show up. Keep holding the buttons for 10 seconds until the countdown finishes.
DAVEGA X Tool (obsolete)
DAVEGA X Tool can be used for backing up and restoring the data as well as for updating the firmware over USB.
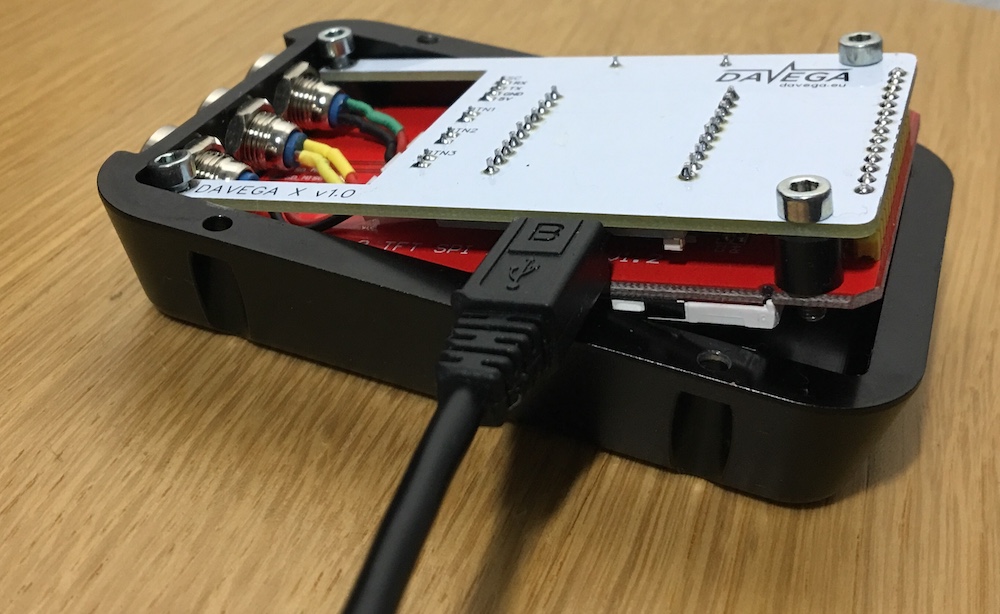
To access the USB port, you will need to remove the DAVEGA from your board and loosen the 4 bolts holding the PCB to the housing. Then carefully lift the side of the PCB away from the buttons and plug into the microUSB port.
Before you can use the DAVEGA X Tool, you will need to download and install the CP2102 drivers for your operating system.
Download the DAVEGA X Tool from the downloads page.
Put any data files (.dfs, .bin) in the same directory as the DAVEGA X Tool executable.
DAVEGA X Tool needs to be run once for each action. Start with detecting the DAVEGA port or enter it manually.