Assembling DAVEGA X (pre 2021 version)
These instructions are valid for the old (pre 2021) kits. New kit assembly instructions.
DAVEGA X is provided as a kit by default. Anyone should be able to complete it, even if they don't have a previous experience with soldering. Assembling the kit is fun and will give you a good sense of achievement.
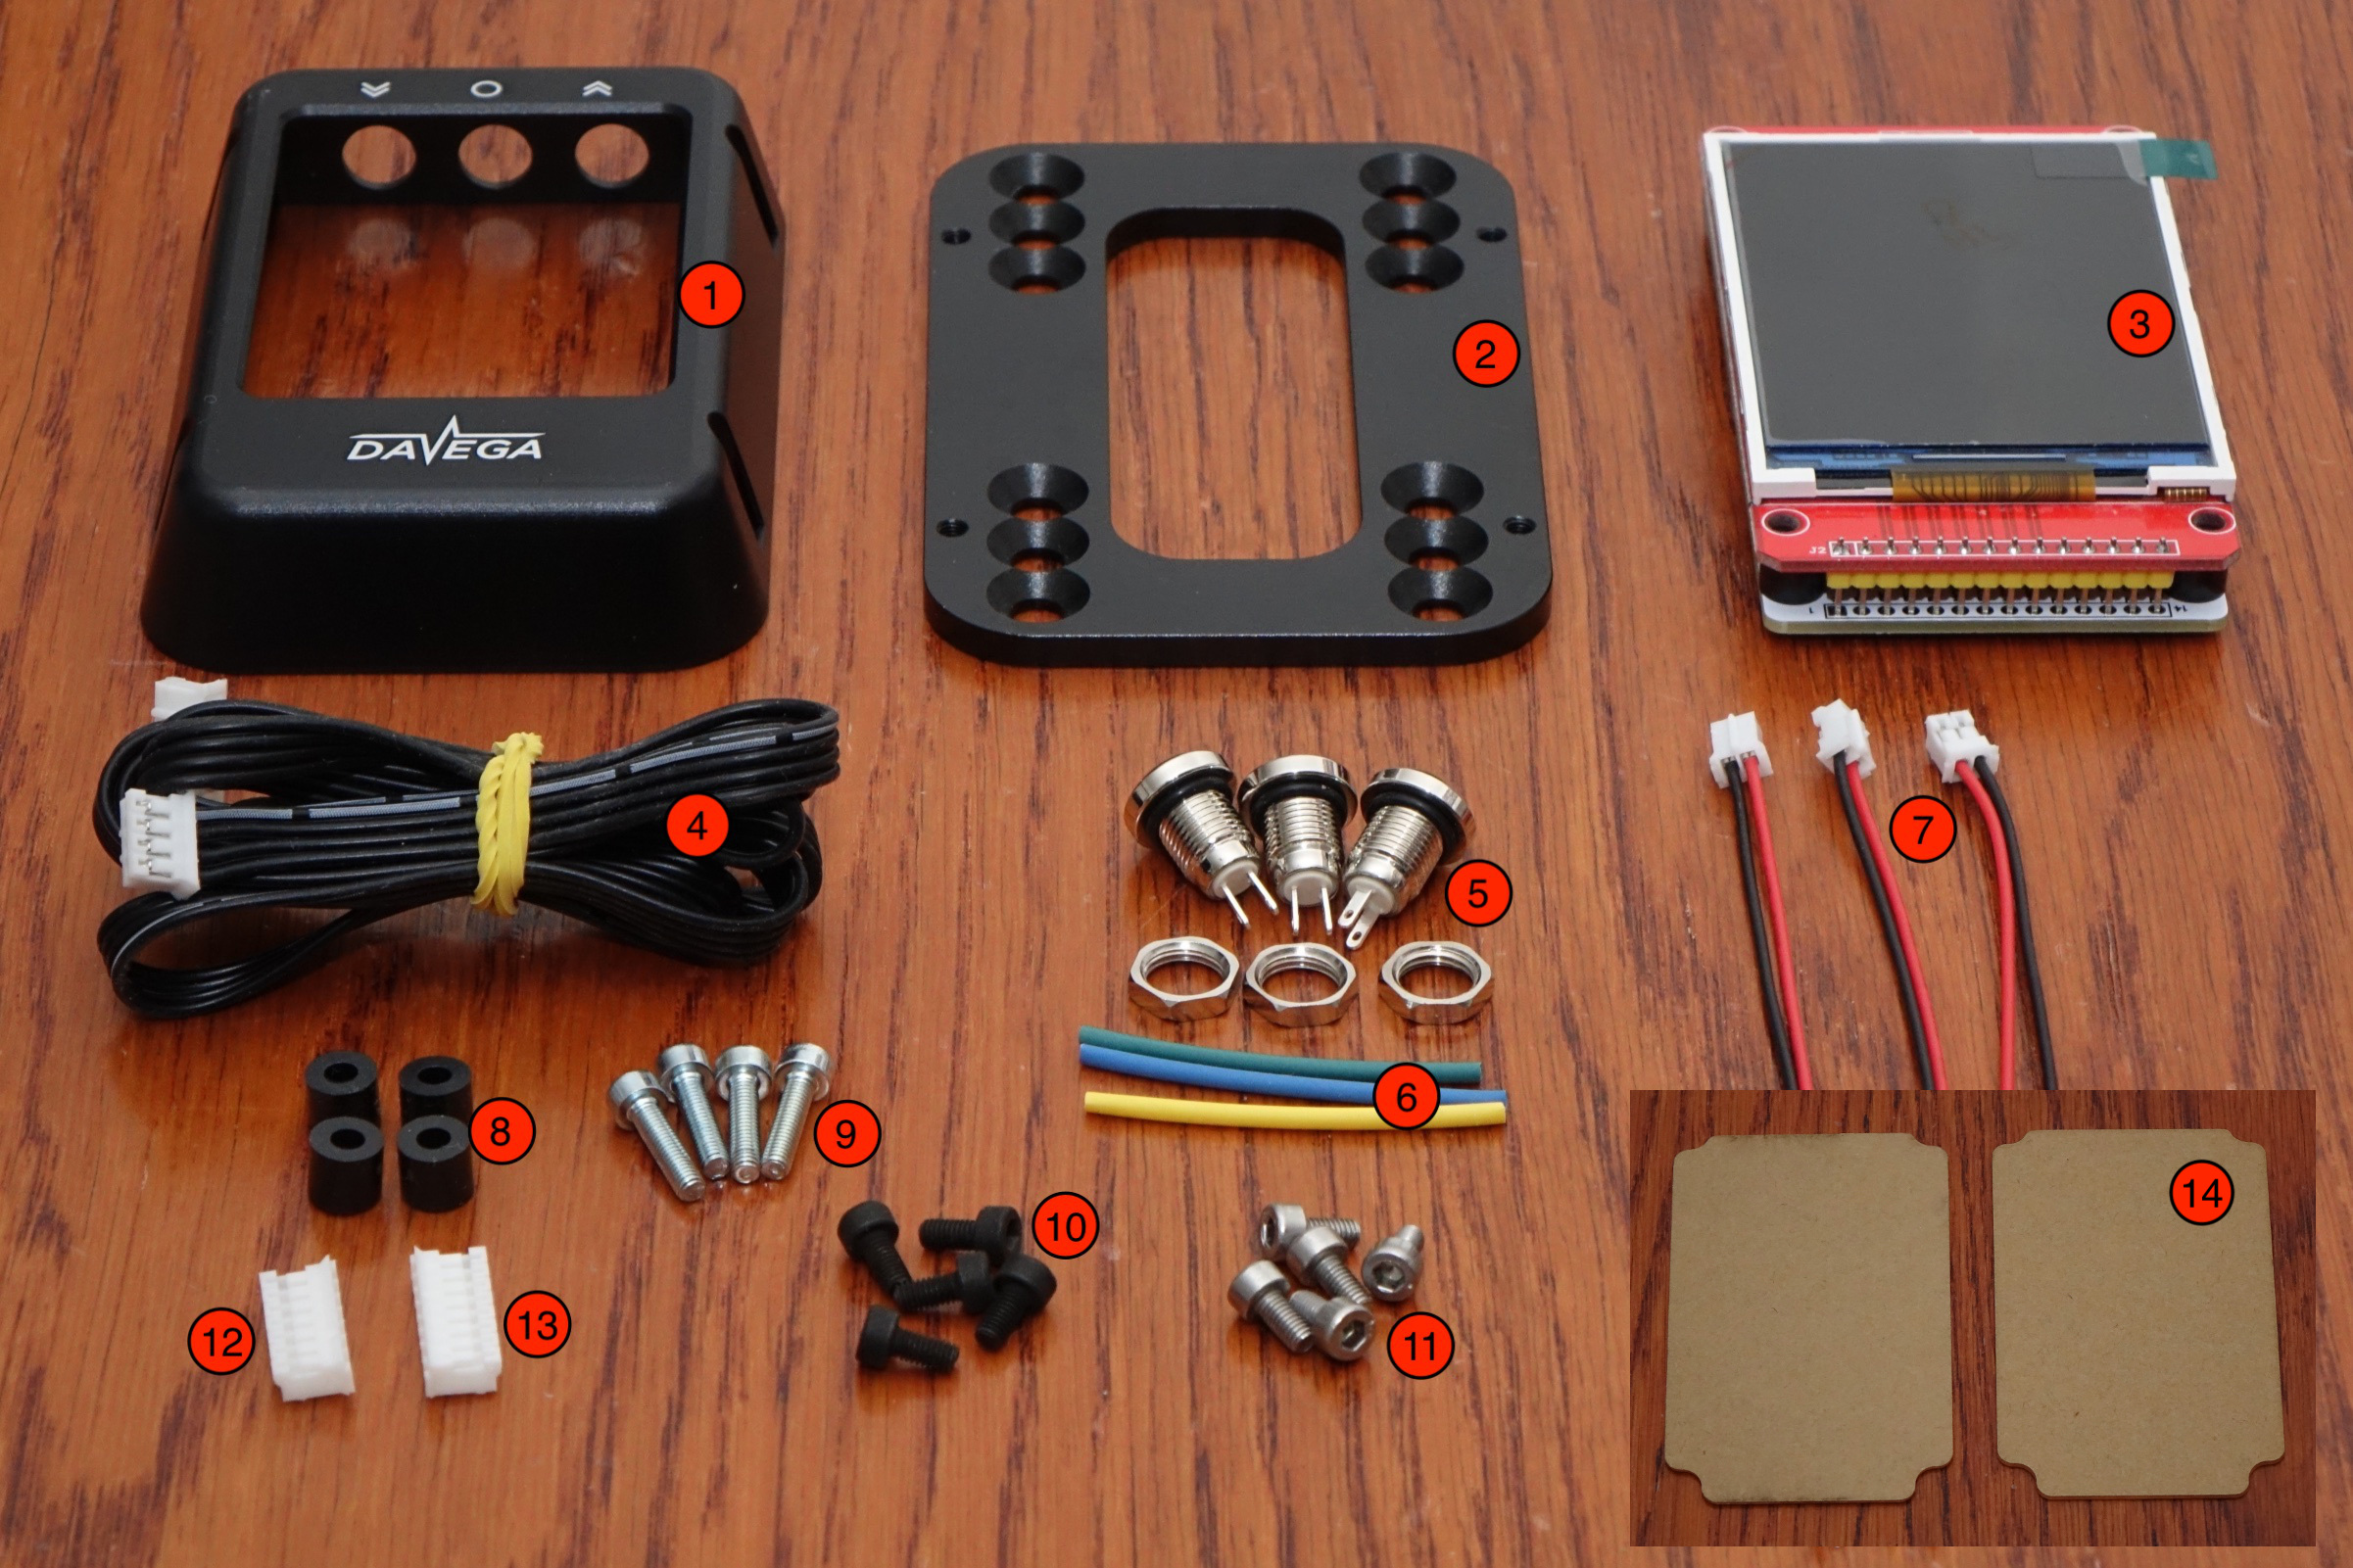
Your kit should contain the following items:
- aluminum housing
- aluminum baseplate
- DAVEGA X electronics
- ribbon cable with JST-PH connectors
- stainless steel buttons with o-rings and nuts (3pcs)
- heat shrink tubing
- wires with 2P JST-PH connectors (3pcs)
- M3x6mm nylon spacers (4pcs)
- M3x12mm stainless steel bolts (4pcs)
- M3x6mm bare steel bolts (5pcs)
- M3x6mm stainless steel bolts (5pcs)
- JST-PH 7P connector
- JST-PH 8P connector
- protective glass (2pcs)
You will need the following to complete the assembly:
- glue (clear silicone sealant is recommended)
- soldering iron
- 2.5mm allen key
- 10mm wrench
Installing protective glass
Using the protective glass is recommended but not strictly necessary if you don't need to waterproof the housing. DAVEGA display is slightly easier to read without being overlayed by the protective glass and using it naked may be preferred if you don't plan on riding in bad weather conditions and/or off road. For a basic protection against display scratching, consider using some of the widely available mobile phone display protective films that can be easily trimmed to size.